Pond Life


It’s been quite a while since I posted – summer is such a busy time!

Today, we are heading to the pond. When I was younger, I would go down by the river ( I know, not the same as a pond, but you get the idea) to feed the ducks. As soon as one duck showed up, they would all waddle up to get their share of bread.

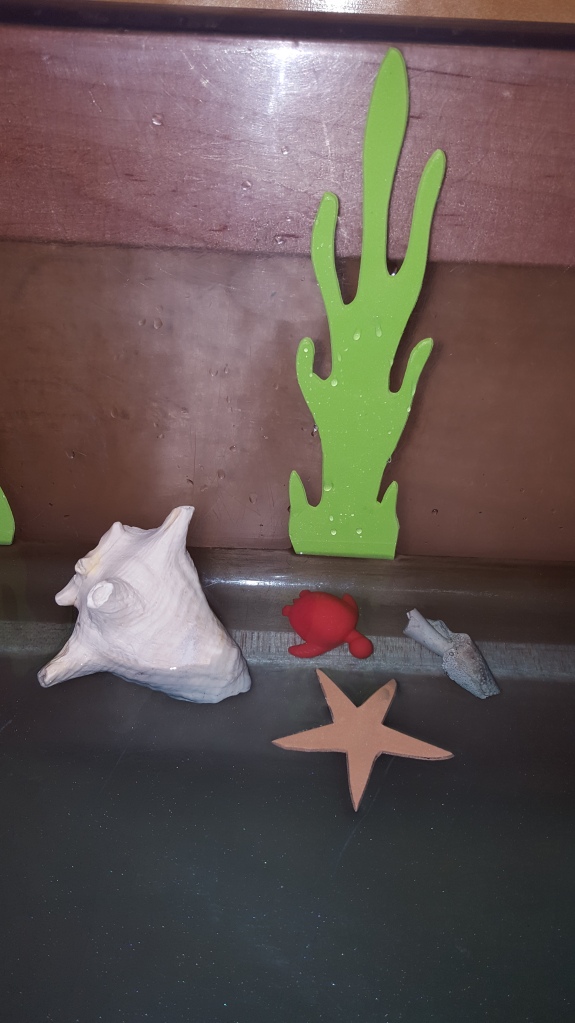
After talking about pond animals all week, we walked the kiddos to the pond a few blocks down the road from the childcare center in search of some ducks. Unfortunately, we did not see any. We did see a few turtles, some dragonflies and some other bugs. So, we went back to the center and made our own ducks 🙂

These cute ducks are easy to make, and even stand on their own! I had the kids use brown, green and white paint to paint a paper plate. Once dry, I folded the plate in half. The kiddos glued orange feet, cut-out of paper, to the bottom of the plate. They then glued on a cut-out head shape, and bill. Lastly, I found some feathers for them to glue wherever they wanted onto the body.

As you can see, some of our ducks have some pretty flexible necks 😉

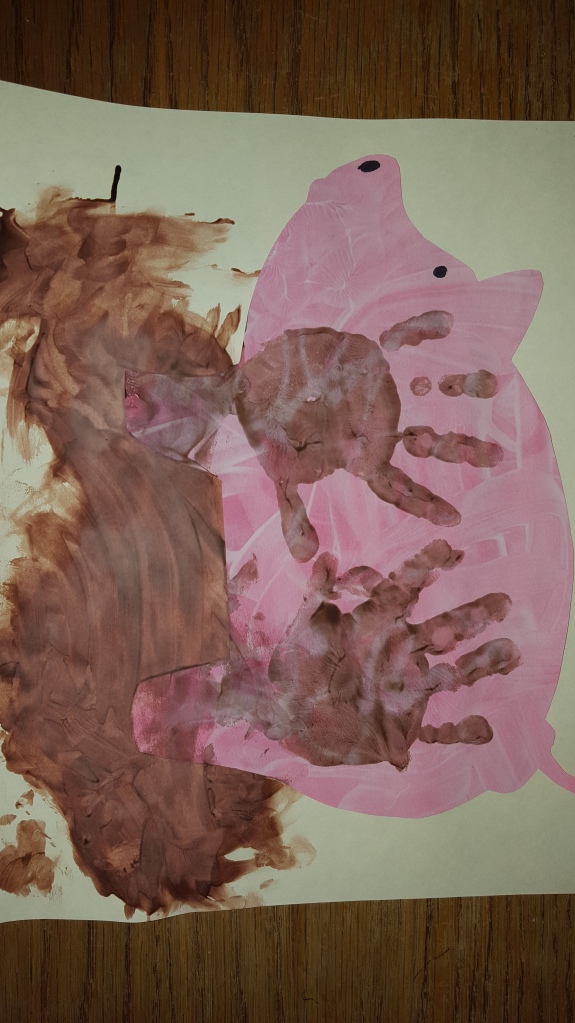
I added these cute ducks to my pond bulletin board that I put up last month. During our pond theme, we also made cattails using the kids footprints. They added a nice, personal touch to our board.

20160812_095935

Don’t mind the grease mark from the Mr. Twisters 🙂


Let’s Go to the Beach!

We are in the dog days of summer, and it is HOT here! This is great weather to spend a day at the beach, splashing around in the water, collecting sea shells and making sandcastles. Is it too hot for you outside? Bring the beach inside with this simple sensory table idea.

20160606_103330

Here is what you need to create a beach themed sensory table:

Water – I used some blue and silver glitter watercolor to make the water sparkle

Seashells

Sea Animals – Realistic looking fish and other animals would be ideal, but I couldn’t find any, so I used our sea animal counters.

I also cut some seaweed shapes and starfish out of foam. These foam shapes can stick to the walls of the sensory table to make the whole table more interactive 🙂

20160606_103343

The only thing that’s missing is the sand! If you had a sensory table with two separate sections, adding sand would be awesome! What else would you add to create a beach at home?


Gone Fishin’

One of my favorite summer themes is my Fishing unit.

Every summer, my family goes “Up North” for a week. We spend the week on the lake, swimming, boating, tubing and of course fishing. Ever since I was little, I remember my Dad, Grandpa and Uncle taking the boat out every evening to go fishing. Once my brother got older, he joined them as well. When I was a teenager, my cousin and I would tag along sometimes. Now that I’m older, and my Grandpa and Uncle have passed away, I have taken the seat next to my Dad on the boat. I look forward to spending a week every year, in the middle of the Chequamegon – Nicolet National Forest, with no TV and little cell phone reception, spending time with my family.

512.JPG

The above picture is of my Grandpa and I, both with our mounted Walleye that were caught on Gordon Lake (caught in different years of course). Since fishing means so much to me, I love teaching my kiddos about it as well!

I compiled photos of Wisconsin fish, and created a fish matching game for the kids to play. There’s pictures of Northern, Walleye, Muskies, Sturgeon, Bullheads, Crappies, Bass and Bluegill. This game is available during free choice time.

Tonight, I want to share with you a fun little art project, using fishing lures – NO hooks! I found some of my favorite lures for catching those Walleye- Mister Twisters, along with a crayfish lure and some others. I attached string to a few lures to make them look and feel like they were on a fishing line, but easier for the kiddos to handle than actual fishing line.

20160707_105951.jpg

I put out paint in various colors. The kiddos dipped the lures into the paint, and then onto their paper. The stringed lures were a little harder for them to handle, but maneuvering the string did assist them in using their hand – eye coordination.

The result was a colorful piece of art with lines, squiggles, and some claw marks 🙂


Speaking of my week Up North, I will be there next week, enjoying my time on the lake. Stay tuned for another post in a few weeks!


Homemade Ice Cream and Other Dairy Goodies

I’m getting this post out a little later than I originally wanted, but here it is 🙂

To finish off June Dairy Month and our Farm theme, we made homemade ice cream with the kiddos. I found this recipe online that did not require an ice cream maker – http://www.kevinandamanda.com/easy-homemade-ice-cream-without-a-machine/

The recipe only requires TWO ingredients (talk about an easy recipe to make with kids!): heavy whipping cream and sweetened condensed milk. The possibilities are endless on what type of ice cream you want to make as you can add whatever other ingredients you want! We added mashed up fresh raspberries and chocolate chips to ours, plus a little splash of vanilla extract.

Homemade Ice Cream Without an Ice Cream Maker

2 cups heavy whipping cream

1 can sweetened condensed milk

Any added flavorings – we added a container of raspberries, some chocolate chips and a little bit of vanilla extract

In a small bowl, mix together sweetened condensed milk and any added flavorings.

In another bowl, using a stand or hand mixer, whip the cream until stiff peaks form. Hint: freezing the bowl before mixing will make the peaks form faster 🙂

20160623_111541

Fold the cream into the sweetened condensed milk mixture. Freeze until firm.

Here is what our two year olds were able to help with:

  • Mashing up raspberries with a fork
  • Helping twist the can opener
  • Pouring whipping cream and sweetened condensed milk into the bowl
  • Mixing ingredients together
  • Eating our finished ice cream, of course 🙂

I thought the ice cream tasted good, but you could really taste the sweetened condensed milk. If we make it again next year, I would add a little less milk.

20160624_121508


Other Dairy Activities

Throughout the last two weeks, we did a few other dairy related activities that I thought I would share.

Taste Testing

One day we taste tested a variety of different dairy products. Whenever we do taste testing, we make a graph with a “:)” if they liked the product or a “:(” if they did not like it. Besides for getting to try various foods, this is a great math activity. Together we count how many likes and dislikes there were for each food, and also compare which foods were liked the best or least. Here is a list of products you could try: sour cream, cream cheese, various types of block cheeses, yogurt, milk, whipped cream, butter.

Making Butter

This is a fun project to do with kids. They get to experience the different properties of a substance, get to watch the cream turn from a liquid to a solid form right before their eyes and also get to taste test what they created. All you need is one or two containers that seal TIGHT and some heavy cream. Pour the cream into one or two containers, seal them tightly and let the kiddos shake away! Eventually you will get a whipped cream like texture, and then butter will form. Pour our the extra liquid and enjoy 🙂 Again, if you freeze the containers beforehand, the process goes a little quicker. We ate our homemade butter at lunch time on bread. Yum!


Muddy Pigs

Happy cows come from Wisconsin (not California 😉 ) and living in the Dairy State, we are truly enjoying National Dairy Month! Dairy products contain essential nutrients such as calcium and potassium. On any given Saturday in June, somewhere in Wisconsin, you will find a dairy breakfast on a farm. These breakfasts include delicious foods such as eggs, pancakes, sausages, and of course your dairy products – milk, yogurt, and ice cream! Most also have fun activities for the kids such as interactive learning stations or the Agriculture Olympics. If you ever have the chance, check out one of these breakfasts and support your local farmers 🙂 You can find the locations of the upcoming breakfasts here – http://www.dairydaysofsummer.com/farmbreakfast-home.html#!/all

To help celebrate National Dairy Month, we have been learning about the farm at school! Today, I will share a simple farm animal art project with you. Then, stay tuned later this week for some fun dairy related cooking activities!

Before we started this project, we read a book about pigs. We learned that baby pigs are called piglets and that pigs like to roll around in the mud to keep them cool. This cute little piggy craft helps the kiddos learn about color mixing. Yesterday, we used red and white paint and our favorite paintbrush – our hands – to mix together the paint. As the colors mixed, I asked the kiddos what color they were making. Once the painting was dry, I cut out a pig shape. If you have older kiddos, they could even do the cutting themselves! Today, the kiddos spread brown paint on their paper, then glued their pig down. I put some brown paint on their hands and they spread it around the bottom part of their pig. Last, we made two little muddy handprints on their pig 🙂

20160621_153255


Teddy Bear Picnic

“If you go down to the woods today
You’re sure of a big surprise.
If you go down to the woods today
You’d better go in disguise!

For every bear that ever there was
Will gather there for certain,
Because today’s the day the
Teddy Bears have their picnic.”

-Anne Murray

20160527_112200

Having a teddy bear picnic is one of my favorite activities during my picnic theme. The kiddos get to bring their favorite teddy bear (or other stuffed animal) to school, we set out a big blanket inside and we make a classroom trail mix!

A week before our picnic, I sent out an email asking parents to bring in their child’s favorite trail mix ingredient. We got quite a few M & M’s and chocolate chips – not that this chocoholic is complaining 😉 We also mixed in some goldfish, craisins, popcorn, graham bunnies, a few different cereals, and some fun star shaped marshmallows. I added a few gummy bears to the mix as well.

20160527_105400

After we made the trail mix, we sat on our blanket with our bears and I read this version of Teddy Bear Picnic: 20160527_112030.jpg

After I read the story, the kiddos got their bowl of trail mix and started eating with their teddies. The version of the book I read also came with a CD, so as we enjoyed our snack, we listened to the song.

20160527_105416

Ever year, I find it very interesting to watch the kiddos eat their trail mix. Some pick out all their favorite things first, some save their favorites for last, and some just eat whatever they find in their hand from their bowl. I’m in the “save the best for last” crowd. How do you eat you trail mix? 🙂


It’s Time for a Picnic!

It’s finally getting warm and sunny here – just in time for Memorial Day! To me, Memorial Day always indicates the start of summer. What better to do on those warm, breezy summer days than to go on a picnic. The first thing I think of when I think of a picnic, is the classic red and white checkered blanket. Another thing I think of are those pesky ants that want all the sweet picnic food. I combined both of these things to create an art / patterning project for the kids.

Since I work with 2 – 3 year olds, I made the patterning part of the project pretty simple for them. I created a sheet with squares, then marked every other square with an “X.”

20160523_102803

We repeated “red, white, red, white, red, white…” as I pointed to each square, and told them to notice how the “red” always fell on squares with an “X.” After going through this, they did an awesome job finding each “X” and gluing a red square there. Once they had all their squares glued on, they were able to point to each square and say the colors and pattern on their own 🙂

While our red squares dried, we looked through magazines and found foods that we would take on a picnic – hot dogs, sandwiches, chips, crackers, juice, and some fruits and veggies. We had fun talking about what foods we liked and didn’t like as we looked through the magazines.  Each child found 3 items and glued them to their picnic blanket.

The next day, the kiddos used their fingerprints to make some ants on their blankets and food. By this time of year, all of our kiddos know how to count to three, and with assistance, were able to place three fingerprints right next to each other to create the ants. The completed project was a classic picnic scene, complete with the red an white checkered blanket, yummy food and ants.

20160526_083921


Fly Me to the Moon

“Fly me to the moon
Let me play among the stars
Let me see what spring is like
On a-Jupiter and Mars”

-Frank Sinatra

I’ve had this song in my head since I started my outer space theme last week. I even used it to title my bulletin board 🙂 There are SO many fun projects that can be done with an outer space theme. I will share some of the projects we did last week.

The first project was creating a moon. I got this idea from one of the 3-year old preschool teachers that I was an aide for. I made a concoction of shaving cream, glue, gray and silver liquid watercolor, white paint and a little glitter. This made a nice puffy “paint.”

20160509_095737

The kiddos painted with the puffy paint mixture on small circles I had cut out from construction paper. After they painted, they used the bottle cap seen in the picture to make “craters” on their moon.

20160509_102212

The next day, I mixed some liquid water color with a small amount of regular blue and green paint and water. The kiddos used the green and blue to paint on a coffee filter to make the Earth. Then we had a little fun with spray bottles. I made a VERY thin mixture of white paint, gold watercolor and water. Again, this mixture was very thin – thin enough to be able to spray out of a spray nozzle. The kiddos used they fine motor skills and hand muscles to squirt the mixture onto black paper. Once everything was dry, they glued their Earth and moon onto their black starry background.

20160517_113948

Our other art project was to make an astronaut helmet (out of paper). The kids colored their helmet, I cut them out then attached paper straps to each side.

It was pretty rainy in our neck of the woods last week, so we had some extra inside time. During free choice, the kids were able to paint a rocket ship at the easel. We also happened to have an astronaut dress-up shirt in our dramatic play area. I took the children one by one and had them put on their astronaut helmet they had colored and the astronaut dress up shirt. I asked each of them “If you were an astronaut where would you go or what would you do?” Their answers were recorded on a chalkboard that they held for a picture. The kids loved dressing up and those paper helmets were in pretty rough shape by the end of the day 🙂

Here is a picture of our bulletin board outside our classroom. I have blurred out any faces and names to protect the children’s identities. The only thing I would change is finding a different way to attach the Earth to the black paper. The coffee filters were very thin and you can see all of the glue lines. I think this was one of the most fun themes I have done!

20160517_143619


Happy Mother’s Day!

First of all, I want to say Happy Mother’s Day to my amazing Mom! I wouldn’t be where I am today without her. Thank you for your unconditional love, even through some tough situations! I know all those gray hairs are from my brother and I, but you rock them well 😉 Love you always!

Happy Mother’s Day to my Mother-in-Law as well! She raised a great man that I am proud to call my husband. We have two amazing moms to look up to and learn from when we have kiddos of our own.

Happy Mother’s Day to all the other Mommies out there that are reading this! I wouldn’t have my job without women like you. Although there are many different parenting styles and teaching styles, you are all special and amazing! I have learned many things from all the moms that have gone through my classroom and I wouldn’t change that for anything.

All week long, we asked the kiddos why their mom was special. By the end of the week, they came up with some great answers:

  • “She takes me places.”
  • “She swims with me.”
  • “We go to Miller’s (a grocery store).”
  • “She cooks for me.”
  • “She picks me up.”

This year, our kiddos made some special gifts just for their moms. My awesome co-lead, Leslie has done this project every year for the moms. Back in April, we planted some marigolds in little paper cups. This last week, the kiddos used some paint markers to decorate a clay pot. They helped fill their pot with soil and we replanted the flowers.

20160506_093844

20160506_093853

Leslie attached this cute little poem to a popsicle stick and stuck it in the pots as well.

20160506_093812

Each mom also got a copy of this cute poem- If You Give a Mom a Muffin:

  • If you give a mom a muffin,
    she’ll want a cup of coffee to go with it.
    She’ll pour herself some.
    Her three year-old will come and spill the coffee.
    Mom will wipe it up.
    Wiping the floor, she will find dirty socks.
    She’ll remember she has to do laundry.
    When she puts the laundry into the washer,
    she’ll trip over shoes and bump into the freezer.
    Bumping into the freezer will remind her she has to plan supper.
    She will get out a pound of hamburger.
    She’ll look for her cookbook
    (How to Make 101 Things With a Pound of Hamburger.)
    The cookbook is sitting under a pile of mail.
    She will see the phone bill, which is due tomorrow.
    She will look for her checkbook.
    The checkbook is in her purse,
    which is being dumped out by her two year-old.
    Then she’ll smell something funny.
    She’ll change the two year-old.
    While she is changing the two year-old, the phone will ring.
    Her five year-old will answer and hang up.
    She’ll remember she was supposed to phone a friend
    to come over for coffee.
    Thinking of coffee will remind her that she was going to have a cup.
    She will pour herself some more.
    And chances are,
    if she has a cup a coffee,
    her kids will have eaten the muffin that went with it.

Keeping Life Creative made a cute printable of the poem that you can find here: http://keepinglifecreative.com/keeping-life-creative/if-you-give-a-mom-a-muffin

At the end of the week, we had a Mother’s Day “Tea Party.” We made cookies and lemonade and invited the moms to join us for afternoon snack. After they ate, the kiddos gave their mom the presents they made.

We hope the Moms enjoyed the presents as much as the kiddos enjoyed making them. What is your favorite Mother’s Day present you received or made for your mom?


Tissue Paper Butterflies

20160429_150534
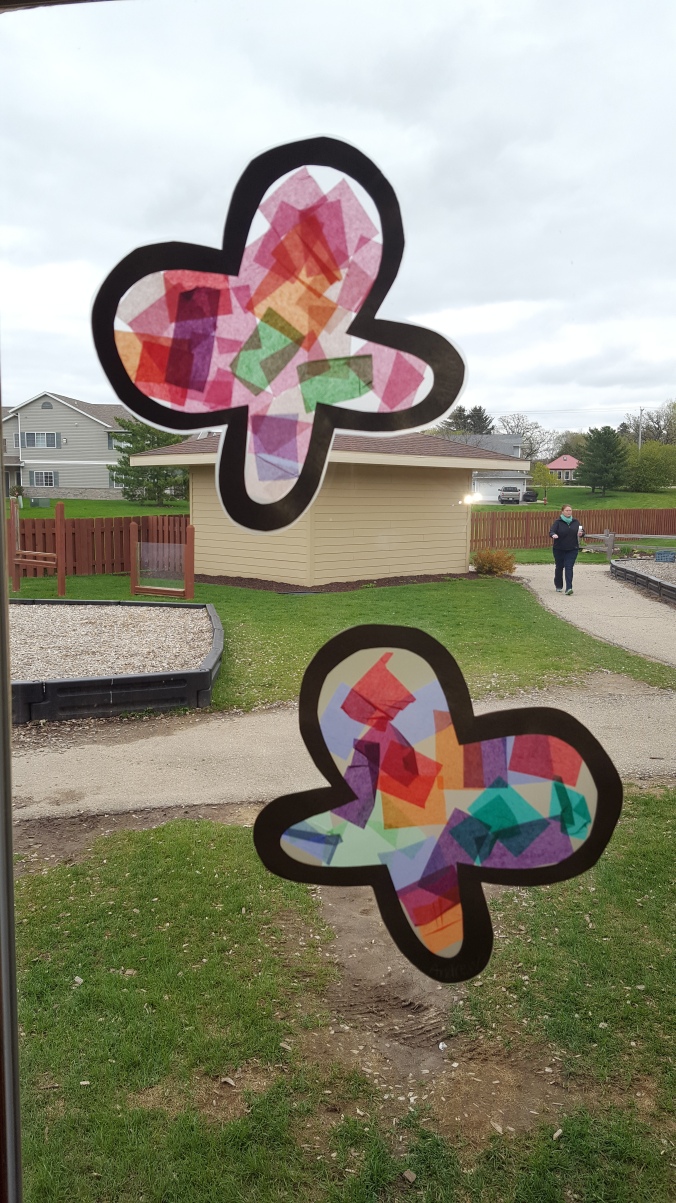
Tonight I have a super easy project for you! You can do this project at home with your own kids, or in your classroom. You only need a few supplies that you probably already have on hand:

  • Tissue paper
  • Contact paper
  • Scissors
  • Construction paper (I used black)

I do this project a few times throughout the year using different shapes for different themes – raindrop shapes for weather, butterflies for spring, or acorns for fall. I just change the colors of tissue paper used to fit the project. This project is great because it really focuses on having the kiddos use their fine motor skills. I try to have them pick up one piece of tissue paper at a time, and encourage them to lay it flat on the contact paper. It is also a great sensory experience as the contact paper is sticky to the touch.

Now onto the project:

  • Cut various colored tissue paper into smallish squares.
  • Cut out a simple butterfly outline shape using construction paper.
  • Cut out squares of contact paper slightly larger than butterfly shape.
  • Peel backing off of contact paper and place the butterfly outline on the paper.
  • Have your child place tissue paper pieces onto the contact paper inside the shape.
  • Once they are finished, cover the tissue paper with another piece of contact paper.
  • Cut out around butterfly outline.

These look great hung on windows or doors where the sun can shine through the beautiful tissue paper colors.

20160429_150543.jpg